When developing an application usually we need to add to add third party libraries; there are a lot of Swift libraries that covers subjects as diverse and useful as object mapping, json parsing, logging, networking, REST calls, etc.
Chances are that if we need to use any of those features in our project, we are going to use an already existing library, instead of reinventing the wheel, and code it from zero.
Without a dependency manager, we have to deal manually with our projects dependencies, which means we have to go to the library homepage, download it, compile it, add it to our project … On the top of that to keep the libraries up to date, we would have to visit regularly the library site to check if it has been updated, and in that case download the new version, add it to the project, etc… If our project has many external dependencies the process will soon become too time consuming, and prone to error.
Here is when dependency managers come in handy. Currently there are 2 widely used dependency managers available for Swift: CocoaPods, and Carthage. There is also a Swift package manager. But since the vast majority of Swift libraries out there use either CocoaPods, or Carthage we will focus on these ones.
Managing dependencies with Carthage
1. Install Carthage
Install Carthage using, for example, Homebrew
brew install carthage
In case you do not have Homebrew installed in your machine, and if you do not want to install it, you can also download a .pkg file from Carthage’s homepage and simply run it.
2. Create a Cartfile
Go to your project root folder and create a file named Cartfile
touch Cartfile
3. Add the dependencies for your project to the Cartfile
Edit the Cartfile and add the required dependencies. For example, to include Alamofire, and SwiftyJSON we would do this (information on how to add a specific library can be found at the library homepage):
github "Alamofire/Alamofire" ~> 4.3
github "SwiftyJSON/SwiftyJSON"
4. Download and build your project dependencies
carthage update --platform iOS --no-use-binaries
The –platform switch is used to specify for which platform we are going to build the libraries. If we are developing an app for an iPhone we need only to build the framework for iOS. If we do not use the –platform switch to specify so, Carthage will build library for all the frameworks available.
The –no-use-binaries switch is used to compile the library using your local compiler. If not specified a pre-build library is used. That pre-build library will be OK most of the times, but at times we may find out, for example, that we are using a newer version of Swift than the one that it was used to generate the pre-build. For those cases we need to use the –no-use-binaries switch to recompile the library according to our specifications.
5. Add the libraries to your project
In this example we have build the libraries for the iOS platform, consequently in /Carthage/Build/iOS we will find our libraries build. Then we can add them to our Embedded Binaries, and after that we are are ready to use them.

Managing dependencies with CocoaPods
1. Install CocoaPods
sudo gem install cocoapods
2. Create a Podfile
Navigate to the root directory of your project and run this command to create a default Podfile:
pod init
The above command creates a Podfile with the following default content:
# Uncomment the next line to define a global platform for your project
# platform :ios, '9.0'

target 'mapper' do
  # Comment the next line if you're not using Swift and don't want to use dynamic frameworks
  use_frameworks!

  # Pods for mapper

end
3. Add your project dependencies to the Podfile
Now you need to add your dependencies. For example this is the line we need to add to include Alamofire in our project (information on how to add a specific library can be found at the library homepage)
# Uncomment the next line to define a global platform for your project
# platform :ios, '9.0'

target 'mapper' do
  # Comment the next line if you're not using Swift and don't want to use dynamic frameworks
  use_frameworks!

  # Pods for mapper
  pod 'Alamofire', '~> 4.3'
end
4. Install dependencies
Run the following command to install the specified dependencies
pod install
5. Open your project and start working 🙂
Finally you need to remember that, from now on, to open your project you must open the workspace file (*.xcworkspace), instead of the project file (*.xcodeproj).

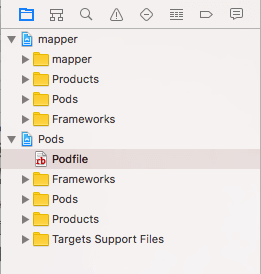
This is because CocoaPods creates a wordspace for your project, and adds a new Xcode project for the pods:
That’s all. If you liked this post, you can subscribe to my blog (click at the follow button at the bottom), and you will be notified when new post are written.

January 13, 2019 at 1:50 pm
Reblogged this on Tech Reblogs.
LikeLike